
Blown In Insulation Calculator
Estimate bags to buy, added insulation depth and a materials budget. For open attic floors—not dense-pack walls.
A blown in insulation calculator answers the question that stalls most attic projects: how many bags do I actually buy? Because coverage depends on target R-value rather than square footage alone, guessing at the store usually means a second trip or wasted material.
Below, you’ll find the coverage maths, the manufacturer chart figures, and a free tool that works out your bag count instantly.
How Blown In Insulation Coverage Works
Most people assume insulation is priced by area. Actually, coverage works differently, since a single bag covers less area at higher R-values.
The reason is straightforward. Achieving R-49 means blowing a deeper layer than R-30, so the same bag spreads across fewer square feet.
Here’s the published AttiCat coverage chart for 27.5 lb bags:
| Added R-value | Bags per 1,000 sq ft | Depth |
|---|---|---|
| R-13 | 5.9 | 5 in |
| R-19 | 9 | 7 in |
| R-22 | 10.5 | 8 in |
| R-26 | 12.6 | 9.5 in |
| R-30 | 14.6 | 10.75 in |
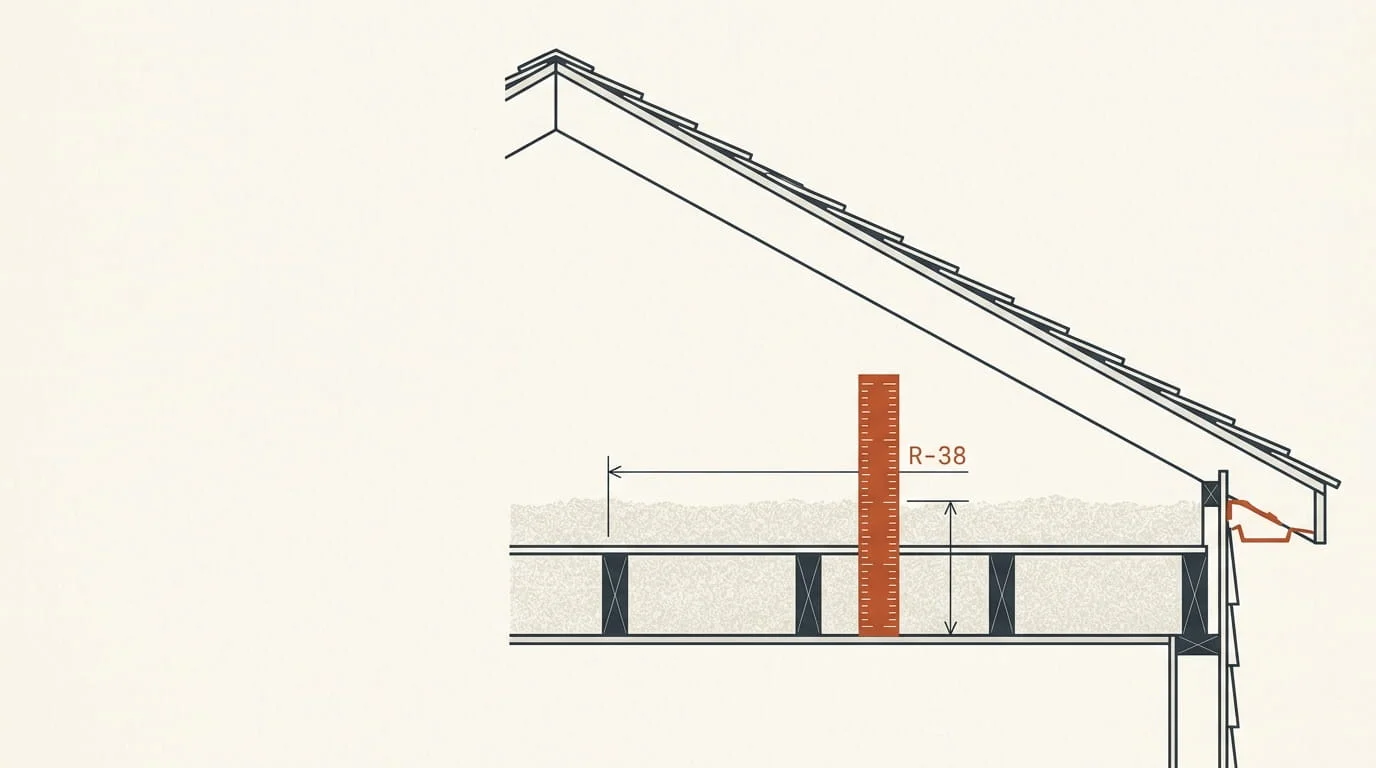
| R-38 | 19 | 13.5 in |
| R-44 | 22.4 | 15.5 in |
| R-49 | 25 | 17 in |
| R-60 | 31.5 | 20.5 in |
Notably, R-60 needs more than five times the material of R-13. Therefore, choosing your target first is essential before any quantity calculation.
The Added R-Value Formula
This is where most DIY calculations go wrong. You don’t buy insulation for your target R-value — you buy for the difference between target and existing.
Added R = Target R − Existing effective R
For example, if your attic already has R-19 and you want R-49:
- Added R needed = 30
- Bags per 1,000 sq ft = 14.6
- On a 1,200 sq ft attic, that’s 18 bags
Consequently, buying for R-49 outright would have meant 30 bags — roughly $180 of unnecessary material.
Crucially, use your assessed effective R-value rather than a visual guess. Old insulation compacts and degrades, so twelve inches of settled fiberglass rarely performs at its original rating.
👉 Try the free Blown In Insulation Calculator
How Many Bags Do I Need?
The bag formula follows directly from the coverage chart:
Bags = Area (sq ft) × Bags per 1,000 ÷ 1,000, rounded up
Rounding matters here. Since you can’t buy a partial bag, the calculation always rounds up to the next whole bag.
Here’s what that looks like across common attic sizes at R-38 added:
| Attic area | Bags needed | New depth |
|---|---|---|
| 600 sq ft | 12 bags | 13.5 in |
| 800 sq ft | 16 bags | 13.5 in |
| 1,000 sq ft | 19 bags | 13.5 in |
| 1,500 sq ft | 29 bags | 13.5 in |
| 2,000 sq ft | 38 bags | 13.5 in |
Additionally, the calculator rounds your added R-value up to a published chart row rather than interpolating between them. That approach is deliberately conservative, because installing below a label minimum won’t deliver the stated performance.
Why Depth Matters as Much as Quantity
Two things determine whether your insulation performs: how much you install, and how deep it sits.
- Initial depth — the layer height immediately after blowing
- Settled depth — where it stabilises after a few weeks
Installing the correct number of bags at too shallow a depth over too large an area fails on both counts. Therefore, mark your target depth on rafters or a ruler before starting, then check as you work.
Furthermore, the depth figures in the chart apply to the new layer only. If you’re topping up existing insulation, your total depth will be greater than the chart shows.
Blown In Insulation Cost
Material costs vary meaningfully by store, region and season. Rather than inventing a price, the calculator asks you to enter your actual local bag price — which is why its budget figures are trustworthy.
For context, 2026 market ranges typically look like this:
| Item | Typical range |
|---|---|
| Fiberglass bag (27.5 lb) | $30 – $45 |
| Cellulose bag (~19 lb) | $12 – $20 |
| Blower rental | $0 – $100 per day |
| Professional installation | $1.00 – $2.50 per sq ft |
Many retailers waive blower rental when you buy a minimum number of bags. Consequently, always ask before paying for equipment separately.
What the budget excludes:
- Labour, if you hire installers
- Old insulation removal
- Air sealing before insulating
- Baffles and ventilation chutes
- Attic hatch insulation and weatherstripping
Regarding air sealing specifically, do it first. Because insulation slows heat transfer but doesn’t stop air movement, blowing over unsealed gaps wastes a large share of the benefit.
Fiberglass vs Cellulose Loose Fill
Both work well, though they behave differently.
| Fiberglass | Cellulose | |
|---|---|---|
| R-value per inch | ~2.5 | ~3.5 |
| Depth for R-49 | ~17 in | ~14 in |
| Cost per bag | Higher | Lower |
| Settling | Minimal | 10–20% |
| Moisture behaviour | Doesn’t absorb | Absorbs, then dries |
| Fire treatment | Naturally non-combustible | Chemically treated |
Cellulose achieves target R-values in less depth, which helps in shallow attics. Fiberglass, on the other hand, settles less and handles occasional moisture better.
Either way, use your actual bag label figures in the calculator’s custom mode rather than assuming. Coverage charts differ between manufacturers and even between product revisions.
How to Use the Blown In Insulation Calculator
Follow these steps for accurate quantities.
1 — Measure your attic floor area
Multiply length by width, then subtract any unfloored or excluded sections.
2 — Choose your target R-value
Select from R-30, R-38, R-49 or R-60 based on your climate and goals.
3 — Enter your existing effective R-value
Assess it properly. Enter 0 only if the attic is genuinely bare.
4 — Pick your product mode
Use the AttiCat preset, or switch to custom and enter your own bag label values.
5 — Select your chart location
Choose the Minnesota supplement if that chart applies to your product.
6 — Set a purchase reserve
Adding 5–10% gives you spare inventory, though it doesn’t change application density.
7 — Enter your local bag price
Check the store or website first, since the tool won’t guess for you.
8 — Review bags and depth together
Both figures matter. Hitting the bag count while spreading too thin defeats the purpose.
Common Blown In Insulation Mistakes
Avoid these and your attic will perform as intended.
- Covering soffit vents — install baffles first to protect airflow
- Burying recessed lights — non-IC-rated fixtures need clearance
- Insulating over wet material — resolve moisture before adding anything
- Skipping air sealing — gaps undermine the whole installation
- Blocking the attic hatch — insulate and weatherstrip it separately
- Working without protection — respirator, goggles and long sleeves are essential
- Disturbing suspected asbestos or vermiculite — stop and get it tested
Above all, keep clearance around chimneys, flues and any heat source exactly as the manufacturer specifies.
Frequently Asked Questions
Is the blown in insulation calculator free?
Yes, entirely free with no sign-up. Moreover, you can copy the estimate or save it as a PDF to take to the store.
How much does it cost to insulate an attic?
DIY material costs typically run $0.50 to $1.50 per square foot, while professional installation lands between $1.00 and $2.50. Your exact figure depends on target R-value and local bag pricing.
How many bags of insulation do I need for a 1,000 sq ft attic?
At R-38 added, that’s about 19 bags of 27.5 lb fiberglass. Requirements rise sharply at higher R-values.
Can I blow insulation over existing insulation?
Yes, provided the existing material is dry and uncontaminated. Just remember to calculate for the added R-value rather than the total target.
What R-value do I need in my attic?
Most guidance lands between R-38 and R-60 depending on climate zone. Confirm your local requirements, since this tool estimates materials rather than code compliance.
Do I need to remove old insulation first?
Usually not. However, remove anything wet, mouldy or rodent-contaminated before adding new material.
Calculate Your Bags Now
Rather than guessing at the store, enter your attic area and R-value target to see your exact bag count and target depth. Afterwards, add your local bag price for a real materials budget.
3 thoughts on “Blown In Insulation Calculator: Bags, R-Value and Depth”